Unity Tutorial

This tutorial website briefly introduces the various parts of the Unity game engine.

Steps are then provided to set up a basic Flappy Bird game from scratch.

Some basic coding experience may be needed to follow along.

Get Started

Creator's Statement

   I chose to write up a tutorial on creating Flappy Bird as it acts as a good starting point for someone interested in learning Unity and creates an immediately gratifying result without too much hassle. The overview of the 
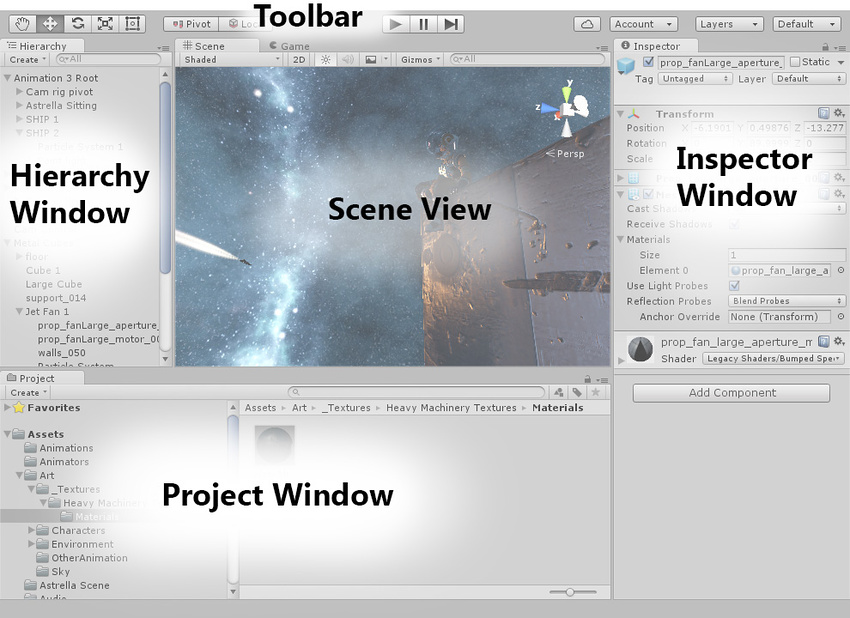
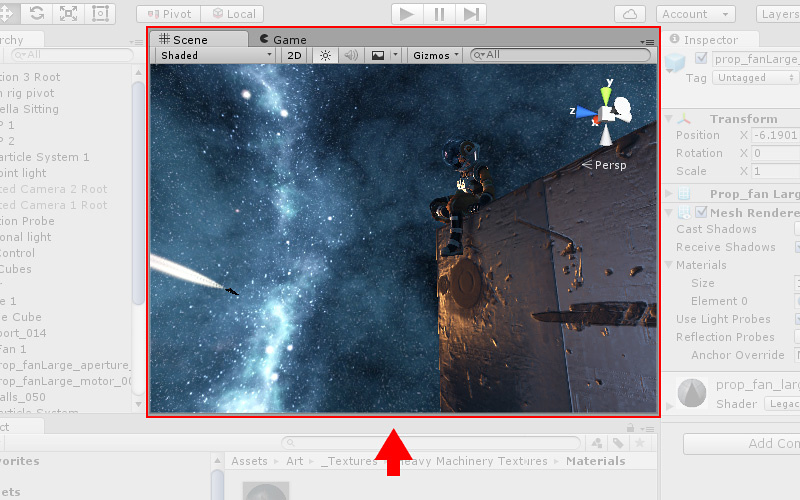
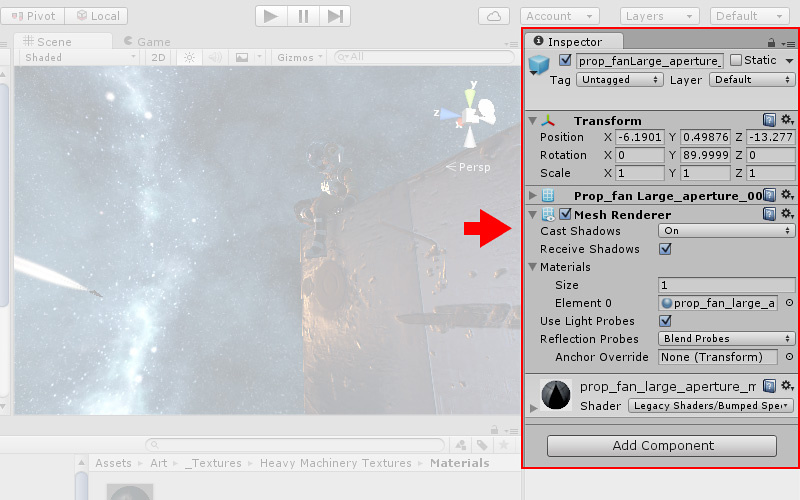
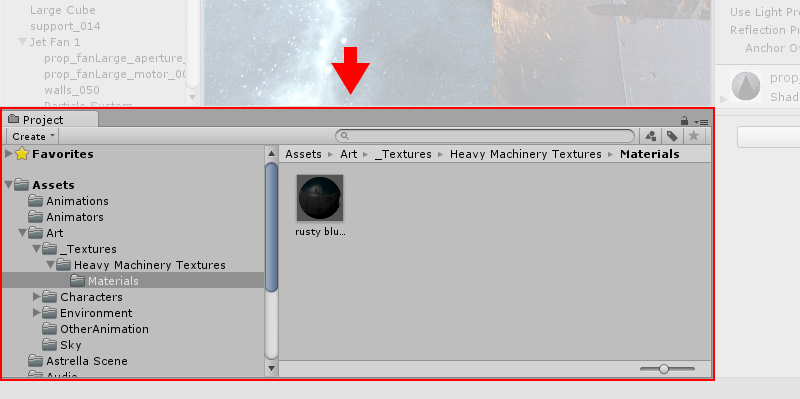
interface further cements this goalby giving readers the bare minimum information needed to get started.

   Much of the difficulty in this project came from rephrasing terminology to cater to readers. As a fully- featured game engine, Unity works on many of its own proprietary systems and thus decisions had to be made on which ones should be explained and which ones should be glossed over. Minimizing jargon would be ideal, but concepts like GameObjects and Components are too integral to be ignored.

   A website was used for this module, as I figured people using Unity would be on a computer anyway. With a website, readers could switch between their demo project and the instructional website fairly easily. Also, websites allow for some interactive functionality (such as linking), though this wasn’t explored too much in this case. The website itself would be much more accessible than a physical document as well.

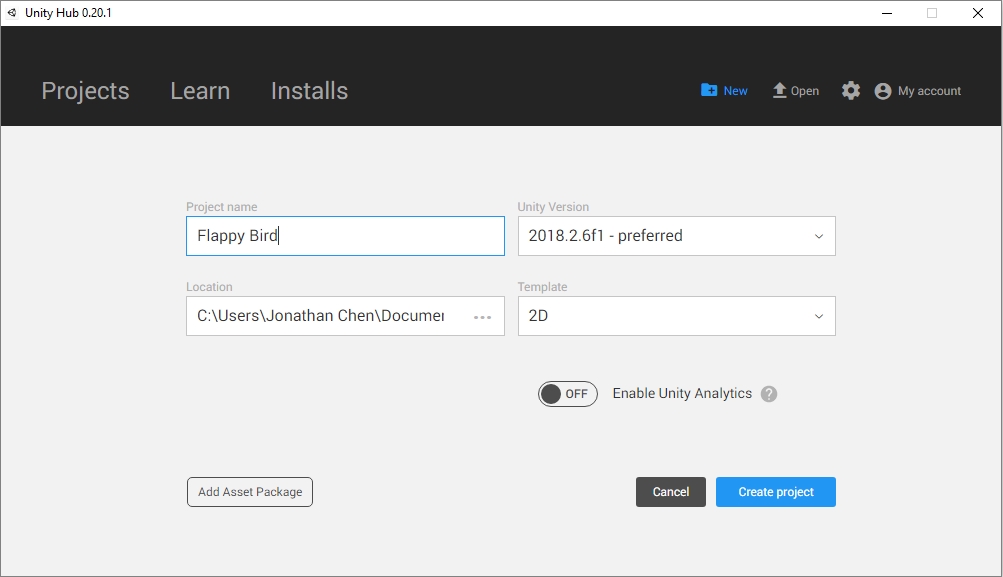
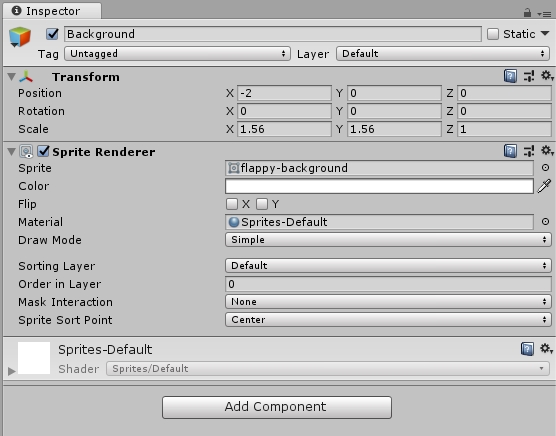
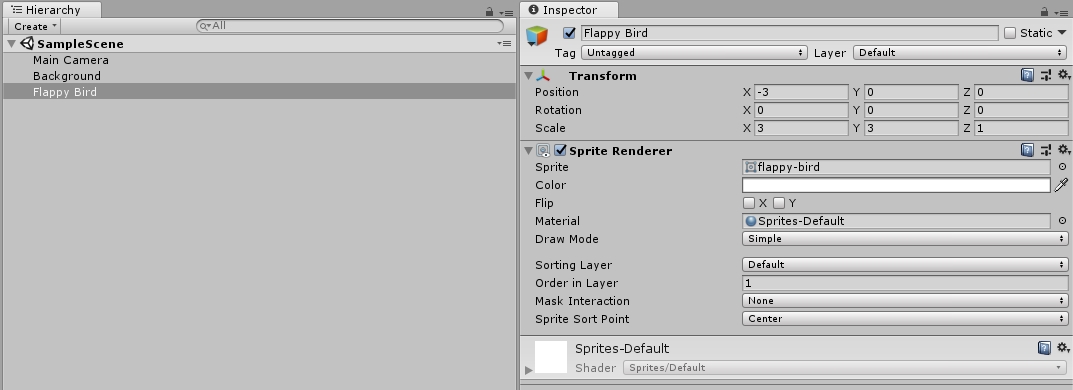
   The drafting process for the tutorial was fairly intuitive. I simply worked my way through how I would create a Flappy Bird game, while avoiding any functionality that might be too nuanced for a beginner’s tutorial. As I worked, I took frequent screenshots and documented my steps in the form of bullet points, which were then used to create the website.

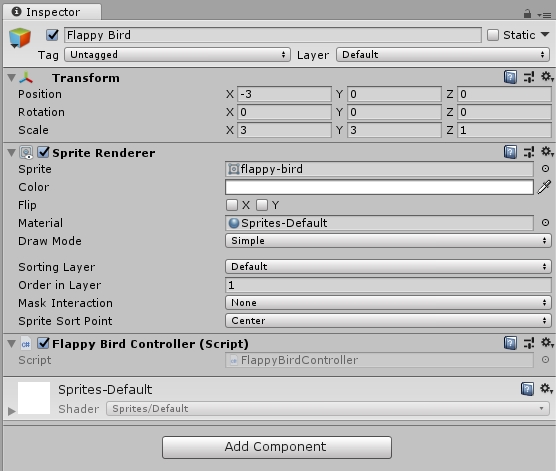
   Following user test day, I opted to section off the instructions more strongly, providing more structure to the tutorial. Images and code blocks were better placed to break apart large sets of instructions, keeping things less monotonous.

Hierarchy Window

Every object in your Unity game is a GameObject. This includes characters, items, cameras, and more.


The hierarchy window shows the relationships between these GameObjects in a fashion similar to a file tree. An object indented beneath another object represents a parent-child relationship.


Scene View

Every GameObject in Unity is positioned in 3D space. This applies to 2D games as well.


The scene view allows you to view and navigate this space, as well as edit any GameObjects within it.


Inspector Window

GameObjects need components in order to function in a specific way.


The inspector window allows you to see and edit the components of the currently selected GameObject. Each component may have its own settings to edit.


Project Window

The project window displays any files (such as images or scripts) that can be used in your project.


Flappy Bird Setup

Creating the Project

  • Launch the Unity editor and hit "New" in the top right corner
  • Unity version 2018.2.6f1 is used in this tutorial, though newer versions should work just as well
  • Template should be set to "2D", as we are creating a 2D game
  • Hit "Create project" in the bottom right corner to finalize the process


Importing Sprites

  • Create a Sprites folder in the Assets folder by right clicking in the project window
  • Download the following images:
  • Background | Bird | Game Over | Pipe
  • Move the images into the Sprites folder so that they can be used in your project


Adding a Background

  • Drag the background image you just imported from the project window into the hierarchy window to automatically create a GameObject
  • Note that the GameObject has a SpriteRenderer component that holds the image; this component is what displays the image in the game
  • Also note the white box in the scene view; this is the area that the Main Camera can "see" and thus only GameObjects in this area are displayed
  • You'll want to scale up the background image so that it covers the entire camera area; copying the transform values to the right should work


Adding Flappy Bird

  • Now repeat the process with the Flappy Bird image to add a FlappyBird GameObject to the hierarchy
  • To make sure the background is always drawn underneath the bird, set the bird's "Order in Layer" value to 1 through the inspector


using System.Collections;
using System.Collections.Generic;
using UnityEngine;

public class FlappyBirdController : MonoBehaviour {
  
    float velocity = 0;

    void Start() {
      
    }

    void Update() {
        transform.position += Vector3.up * velocity;
        velocity -= 0.005f;
        if(Input.GetKeyDown(KeyCode.Space)) {
          velocity = 0.15f;
        }
    }
}


Physics and Controls

  • Adding customized functionality in Unity usually involves adding scripts as components to GameObjects
  • Create a new C# script by right clicking in the project window; we will use this script to add the game logic behind Flappy Bird
  • Drag this newly created script to the inspector window (with the FlappyBird GameObject selected) to add the script as a component as shown
  • Open the script in a text editor of your choice; you should see empty "Start" and "Update" methods created for you by default
  • The "Start" method is called once when the GameObject is created, while the "Update" method is called periodically as the game runs
  • To mimic the effect of gravity, we'll store a "velocity" value that is periodically decreased and used to modify the transform position
  • When space is pressed, we'll reset the velocity to a positive value, allowing the player to jump
  • See the code to the left for a sample implementation


Game Over State

  • When the bird leaves the bottom of the screen, the game should end - the bird should be removed and a "Game Over" sign should appear
  • To accomplish this, first add an inactive GameOver object to the scene (see top image)
  • Make sure to uncheck the box on the top left corner of the inspector to deactivate the GameOver GameObject
  • Also set "Order in Layer" to 1 to make sure the sign is drawn over the background
  • Give the FlappyBird script the ability to activate the GameOver object by adding the following lines to the script
  •               
    public GameObject GameOverSprite;
    
    void GameOver() {
        Destroy(gameObject);
        GameOverSprite.SetActive(true);
    }
                  
                
  • To complete this link, drag the GameOver object from the hierarchy window to the "GameOverSprite" slot that you've just created in the script (see bottom image)
  • Finally, modify the FlappyBird's "Update" method to activate the GameOver object when the bird falls off the screen
            
void Update() {
    transform.position += Vector3.up * velocity;
    velocity -= 0.005f;
    if(Input.GetKeyDown(KeyCode.Space)) {
        velocity = 0.15f;
    }
    
    if(transform.position.y < -5) {
        GameOver();
    }
}